English
 Indonesia

Sep 22 2026
How to Request a Custom Hydraulic Seal Kit from a Sample or Drawing
Read More >
A seal kit part number should be treated as a piece of evidence to verify, not as a complete compatibility decision. For excavator spare-parts buyers, the safest workflow connects the equipment, the hydraulic component, the reference number, photos, dimensions, application information, supplier confirmation, sample or drawing review, and final order approval.
This process helps distributors, repair shops, fleet maintenance teams, and purchasing departments reduce errors caused by incomplete labels, copied catalog descriptions, or confusing a machine model with a component reference.

An excavator can contain several hydraulic components, and each component may require a different sealing solution. A machine model alone may identify the equipment family, but it does not necessarily identify the cylinder, pump, valve, motor, or other component being repaired.
A reliable verification record should therefore answer seven separate questions:
Which machine or attachment is involved?
Which hydraulic component is being repaired?
Where did the part number or kit reference come from?
Which photos, dimensions, drawing, or old-part details support the reference?
What information does the supplier confirm?
What will a sample or drawing review verify?
What exactly has been approved before a batch order is placed?
Keeping these questions separate makes it easier to find the missing evidence before a quotation or order is treated as final.
Start with the information available from the excavator, attachment, or service documentation. Record the model exactly as supplied by the buyer. If the information comes from a nameplate, manual, service record, or customer message, record that source as well.
Useful fields include:
Machine or attachment brand, when provided by the buyer;
Machine model and variant, exactly as received;
Equipment serial or identification information, if the buyer is permitted to share it;
Component location, such as boom, arm, bucket, travel, swing, or another identified area;
Customer description of the repair task;
Source and date of the equipment information.
Do not expand a partial description into a complete model claim. If the buyer supplies only a general machine family, mark the record as incomplete and request the next identification item.
The next step is to identify the component that needs service. This is where many part-number errors begin: a buyer names the excavator model, while the supplier assumes which component is involved.
Separate fields should be used for:
Machine model;
Component name;
Component position or application;
Existing seal kit reference;
Supplier or OEM reference;
Internal customer or warehouse reference.
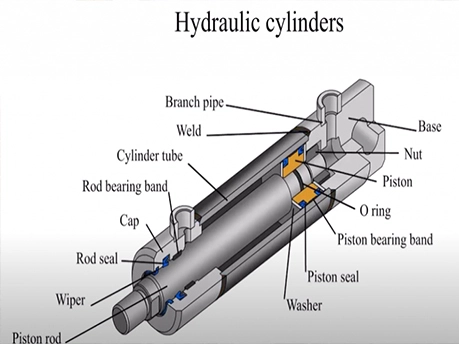
For example, a request for an excavator does not automatically identify a hydraulic cylinder seal kit. It may concern a pump, control valve, swing motor, travel motor, center joint, or another sealing application. The component must be stated or verified before a specific kit is selected.
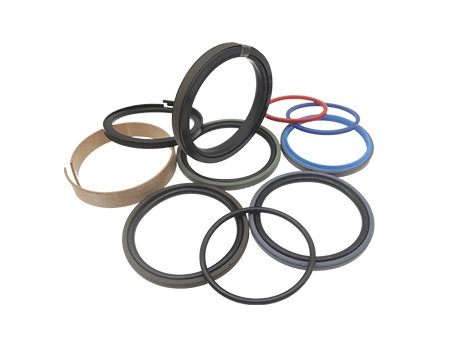
JR Seal’s public Hydraulic Cylinder Seal Kit category can be used as an initial product reference when the request concerns a cylinder application. If the inquiry concerns another component, the buyer should use the corresponding product category and submit the component evidence for review.
A part number is more useful when its origin is recorded. Possible sources include:
Original equipment documentation;
A label on the old kit package;
A marking on the removed part;
A supplier quotation;
A technical drawing;
A customer warehouse record;
A photograph supplied with the inquiry;
An internal SKU or previous purchase record.
Record the reference exactly as received, including hyphens, slashes, spaces, suffixes, and variant characters. Do not silently normalize the number into a different format before the supplier confirms it.
A recommended verification record includes:
| Field | What to record |
|---|---|
| Reference as received | The exact number or text supplied by the buyer |
| Source | Label, drawing, photo, document, old order, or other source |
| Source date | When the reference was captured or last checked |
| Related component | The component connected to the reference |
| Verification status | New, under review, supplier confirmed, sample review, or approved |
| Notes | Any missing, conflicting, or unclear information |
This record prevents a copied reference from losing the context that made it meaningful.
Photos are most useful when they show evidence rather than only a general view of the machine. Before sending images, clean the camera lens and use sufficient light so that markings and seal profiles remain visible.
Recommended photographs include:
The equipment or attachment identification plate, when available;
The old kit label or package marking;
The removed seal laid flat beside a scale reference;
The seal cross-section and visible profile;
The groove or installation area, when safe and permitted;
A wider image showing the component from which the seal was removed;
Any drawing, document, or reference card used by the buyer.
Take several angles when a number, suffix, or seal profile is difficult to read. Do not add text or markings to the image that could be mistaken for the original part number. If an annotation is needed, put it in the message that accompanies the image.
Dimensions help a supplier compare the request with a drawing, sample, or existing record. The buyer should state how each measurement was taken and identify any dimension that is estimated rather than confirmed.
Depending on the component and seal type, the review may require information such as:
Shaft or rod diameter;
Bore or housing diameter;
Groove diameter and width;
Seal cross-section;
Installation space;
Quantity of each seal position;
Dimensions taken from the old seal or from a drawing.
Use consistent units and identify whether a measurement is nominal, measured, or taken from documentation. A single outside diameter is rarely enough to approve a complete seal kit. If a dimension conflicts with the photo or reference number, keep the conflict visible and request clarification.
This article complements, rather than replaces, the site’s existing hydraulic seal measurement guide. The measurement guide addresses measurement practice; this workflow connects measurement evidence to the component, part number, supplier response, and order approval.
The supplier needs to know what the buyer is requesting commercially and technically. Record quantity separately from identification data so that a change in quantity does not accidentally change the part reference.
Include, where available:
Quantity of complete kits;
Quantity of individual seal positions;
Sample or batch requirement;
Seal material requested by the buyer;
Hydraulic fluid or medium information;
Temperature and pressure information supplied by the equipment team;
Static or dynamic movement information;
Surface, groove, or installation conditions;
Packaging and label requirements.
Material should not be selected from the machine model alone. The operating information and supplier’s technical review must support the material or configuration. If the operating conditions are unknown, mark them as pending instead of inserting a typical value.
JR Seal’s public Customization page describes material selection, forming, processing, and inspection as parts of seal manufacturing. For a specific order, the buyer should still ask which material and design information must be confirmed for the requested application.
A useful supplier reply should make it clear which details are confirmed and which still require review. Ask the supplier to respond in a structured format, for example:
| Review item | Supplier response to request |
|---|---|
| Equipment and component | What has been identified and from which evidence |
| Part number | Exact reference used for the review |
| Drawing or dimensions | Which dimensions match and which are missing |
| Material or configuration | Proposed basis and information still required |
| Sample or approval | What the sample or drawing will verify |
| Quantity and packaging | Conditions for the specific inquiry |
| Quality evidence | Applicable inspection or traceability records |
| Commercial terms | Order-specific quotation and conditions |
| Open questions | Items requiring buyer confirmation |
Avoid treating a short statement such as “same model” or “can supply” as a complete technical approval. The response should identify the evidence behind the conclusion.
A sample or drawing review should have a defined purpose. Before approval, record:
The reference number being checked;
The component and application;
The dimensions or drawing revision;
The material or configuration under review;
The number of sample pieces, if applicable;
The approval person or department;
The result and any remaining deviation.
A sample approved for one component should not automatically be used to approve another component. Likewise, a drawing supplied for one reference should not be attached to a different SKU simply because the two descriptions look similar.
If the evidence remains contradictory after sample review, keep the record in a review status and request clarification. Do not force a match to complete a purchase order.
Before a batch order is released, compare the final quotation and order confirmation with the approved evidence chain.
The final sign-off should check:
Equipment and component identity;
Part number as approved;
Drawing, photo, or dimension reference;
Material or operating-condition notes;
Quantity and packaging;
Label and internal SKU information;
Quality or inspection documents agreed for the order;
Commercial and delivery conditions stated for the order;
Responsible approver and approval date.
This final review is not a guarantee of product performance. It is a control that confirms the buyer and supplier are referring to the same request before the order moves forward.
A machine model can help identify the equipment context, but it does not identify every hydraulic component or seal kit installed on that equipment.
A suffix, slash, hyphen, or variant character may be meaningful. Preserve the original reference until the supplier confirms the normalized format.
Do not store cylinder, pump, valve, motor, or center-joint references in one undifferentiated field. The component is part of the identification evidence.
A product title or search result may point to a relevant category, but it does not replace photos, dimensions, drawings, or supplier confirmation.
An old purchase record may help locate a reference, but the current component, quantity, packaging, and operating information still need review.
When requesting a seal kit review, send the equipment information, component name, part number source, clear photos, dimensions, quantity, material or operating information, and packaging requirement. If some information is unavailable, identify it as pending rather than filling the gap with an assumption.
Use JR Seal’s Hydraulic Cylinder Seal Kit category as a starting point for cylinder-related requests, review Customization for technical preparation context, and contact JR Seal with the evidence available for your inquiry.
Send Part Number and Photos for Review so the requested component, reference, dimensions, and next verification step can be discussed before a batch order is finalized.